Nextcloud
- Install NextCloud on Ubuntu 20.04 with Apache (LAMP Stack)
- Install NextCloud on Ubuntu 20.04 with Nginx (LEMP Stack)
- Install NextCloud on CentOS 8/RHEL 8 with Nginx (LEMP Stack)
- Integrate Collabora Online with Nextcloud on Ubuntu without Docker
- How to Easily Integrate OnlyOffice and NextCloud Using Docker
Install NextCloud on Ubuntu 20.04 with Apache (LAMP Stack)
This tutorial will be showing you how to install NextCloud on Ubuntu 20.04 LTS with Apache web server.
What’s NextCloud?
NextCloud is a free open-source self-hosted cloud storage solution. It’s functionally similar to Dropbox. Proprietary cloud storage solutions (Dropbox, Google Drive, etc) are convenient, but at a price: they can be used to collect personal data because your files are stored on their computers. If you worry about privacy, you can switch to NextCloud, which you can install on your private home server or on a virtual private server (VPS). You can upload your files to your server via NextCloud and then sync those files to your desktop computer, laptop or smartphone. This way you have full control of your data.
NextCloud Features
- Free and open-source
- End-to-end encryption, meaning files can be encrypted on client devices before uploaded to the server, so even if someone steals your server, they can not read your files.
- Can be integrated with an online office suite (Collobora Online, OnlyOffice) so you can create and edit your doc, ppt, xls files directly from NextCloud.
- The app store contains hundreds of apps to extend functionality (like calendar app, contacts app, note-taking app, video conferencing app, etc).
- The sync client is available on Linux, macOS, Windows, iOS and android.
Prerequisites
NextCloud is written in PHP programing language. To follow this tutorial, you first need to install LAMP stack on Ubuntu 20.04. If you haven’t already done so, please check out the following tutorial.
You can install NextCloud on your home server or a VPS (virtual private server). You also need a domain name, so later on your will be able to enable HTTPS to encrypt the HTTP traffic. I registered my domain name from NameCheap because the price is low and they give whois privacy protection free for life. Nextcloud can be installed without a domain name, but it really doesn’t make sense if you don’t encrypt the HTTP connection to prevent snooping. I recommend buying a domain name, if you really want to tinker with server software and use them to the fullest potential.
Now let’s install NextCloud.
Step 1: Download NextCloud on Ubuntu 20.04
Log into your Ubuntu 20.04 server. Then download the NextCloud zip archive onto your server. The latest stable version is 21.0.1 at time of this writing. You may need to change the version number. Go to https://nextcloud.com/install and click the download for server button to see the latest version.

You can run the following command to download it on your server.
wget https://download.nextcloud.com/server/releases/nextcloud-21.0.1.zip
You can always use the above URL format to download NextCloud. If a new version comes out, simply replace 21.0.1 with the new version number.
Once downloaded, extract the archive with unzip.
sudo apt install unzip

sudo unzip nextcloud-21.0.1.zip -d /var/www/
The -d option specifies the target directory. NextCloud web files will be extracted to /var/www/nextcloud/. Then we need to change the owner of this directory to www-data so that the web server (Apache) can write to this directory.
sudo chown www-data:www-data /var/www/nextcloud/ -R
Step 2: Create a Database and User for Nextcloud in MariaDB Database Server
Log into MariaDB database server with the following command. Since MariaDB is now using unix_socket plugin to authentication user login, there’s no need to enter MariaDB root password. We just need to prefix the mysql command with sudo.
sudo mysql
Then create a database for Nextcloud. This tutorial name the database nextcloud. You can use whatever name you like.
create database nextcloud;
Create the database user. Again, you can use your preferred name for this user. Replace your-password with your preferred password.
create user nextclouduser@localhost identified by 'your-password';
Grant this user all privileges on the nextcloud database.
grant all privileges on nextcloud.* to nextclouduser@localhost identified by 'your-password';
Flush privileges and exit.
flush privileges;

exit;

Step 3: Create an Apache Virtual Host for Nextcloud
Create a nextcloud.conf file in /etc/apache2/sites-available/ directory, with a command-line text editor like Nano.
sudo nano /etc/apache2/sites-available/nextcloud.conf
Copy and paste the following text into the file. Replace nextcloud.example.com with your own preferred sub-domain. Don’t forget to create DNS A record for this sub-domain in your DNS zone editor. If you don’t have a real domain name, I recommend going to NameCheap to buy one. The price is low and they give whois privacy protection free for life.
<VirtualHost *:80>
        DocumentRoot "/var/www/nextcloud"
        ServerName nextcloud.example.com

        ErrorLog ${APACHE_LOG_DIR}/nextcloud.error
        CustomLog ${APACHE_LOG_DIR}/nextcloud.access combined

        <Directory /var/www/nextcloud/>
            Require all granted
            Options FollowSymlinks MultiViews
            AllowOverride All

           <IfModule mod_dav.c>
               Dav off
           </IfModule>

        SetEnv HOME /var/www/nextcloud
        SetEnv HTTP_HOME /var/www/nextcloud
        Satisfy Any

       </Directory>

</VirtualHost>
Save and close the file. (To save a file in Nano text editor, press Ctrl+O, then press Enter to confirm. To exit, press Ctrl+X.)
Then enable this virtual host.
sudo a2ensite nextcloud.conf
Run the following command to enable required Apache modules.
sudo a2enmod rewrite headers env dir mime setenvif ssl
Then test Apache configuration.
sudo apache2ctl -t
If the syntax is OK, reload Apache for the changes to take effect.
sudo systemctl restart apache2
Step 4: Install and Enable PHP Modules
Run the following commands to install PHP modules required or recommended by NextCloud.
sudo apt install imagemagick php-imagick libapache2-mod-php7.4 php7.4-common php7.4-mysql php7.4-fpm php7.4-gd php7.4-json php7.4-curl php7.4-zip php7.4-xml php7.4-mbstring php7.4-bz2 php7.4-intl php7.4-bcmath php7.4-gmp
Reload Apache to use these modules.
sudo systemctl reload apache2
Step 5: Enable HTTPS
Now you can access the Nextcloud web install wizard in your web browser by entering the domain name for your Nextcloud installation.
nextcloud.example.com

If the web page can’t load, you probably need to open port 80 in firewall.
sudo iptables -I INPUT -p tcp --dport 80 -j ACCEPT
And port 443 as well.
sudo iptables -I INPUT -p tcp --dport 443 -j ACCEPT
Before entering any sensitive information, we should enable secure HTTPS connection on Nextcloud. We can obtain a free TLS certificate from Let’s Encrypt. Install Let’s Encrypt client (certbot) from Ubuntu 20.04 repository.
sudo apt install certbot python3-certbot-apache
Python3-certbot-apache is the Apache plugin. Next, run the following command to obtain a free TLS certificate using the Apache plugin.
sudo certbot --apache --agree-tos --redirect --staple-ocsp --email you@example.com -d nextcloud.example.com
Where:
- –apache2: Use the Apache authenticator and installer
- –agree-tos: Agree to Let’s Encrypt terms of service
- –redirect: Enforce HTTPS by adding 301 redirect.
- –staple-ocsp: Enable OCSP Stapling.
- –email: Email used for registration and recovery contact.
- -d flag is followed by a list of domain names, separated by comma. You can add up to 100 domain names.
You will be asked if you want to receive emails from EFF(Electronic Frontier Foundation). After choosing Y or N, your TLS certificate will be automatically obtained and configured for you, which is indicated by the message below.

I found that Certbot can’t automatically add HSTS header in the Apache config file for Nextcloud. If you would like to enable HSTS (HTTP Strict Transport Security), then edit the file.
sudo nano /etc/apache2/sites-enabled/nextcloud-le-ssl.conf
We can then add the following line in the SSL server block to enable HSTS header.
Header always set Strict-Transport-Security "max-age=31536000"
Like below.

Save and close the file. Then text Apache configurations.
sudo apache2ctl -t
If the test is successful, reload Apache for the change to take effect.
sudo systemctl reload apache2
The above configuration will get A+ score on SSL test.

Step 6: Finish the Installation in your Web Browser
Now you can access the Nextcloud web install wizard using HTTPS connection.
https://nextcloud.example.com
To complete the installation, you need to create an admin account, enter the path of Nextcloud data folder, enter database details you created in step 2. You can use the default localhost as host address, or you can enter localhost:3306, as MariaDB listens on port 3306.
The data folder is where users’ files are stored. For security, it’s best to place the data directory outside of Nextcloud webroot directory. So instead of storing users’ files under /var/www/nextcloud/data/, we can change it to /var/www/nextcloud-data. which can be created with the following command:
sudo mkdir /var/www/nextcloud-data
Then make sure Apache user (www-data) has write permission to the data directory.
sudo chown www-data:www-data /var/www/nextcloud-data -R

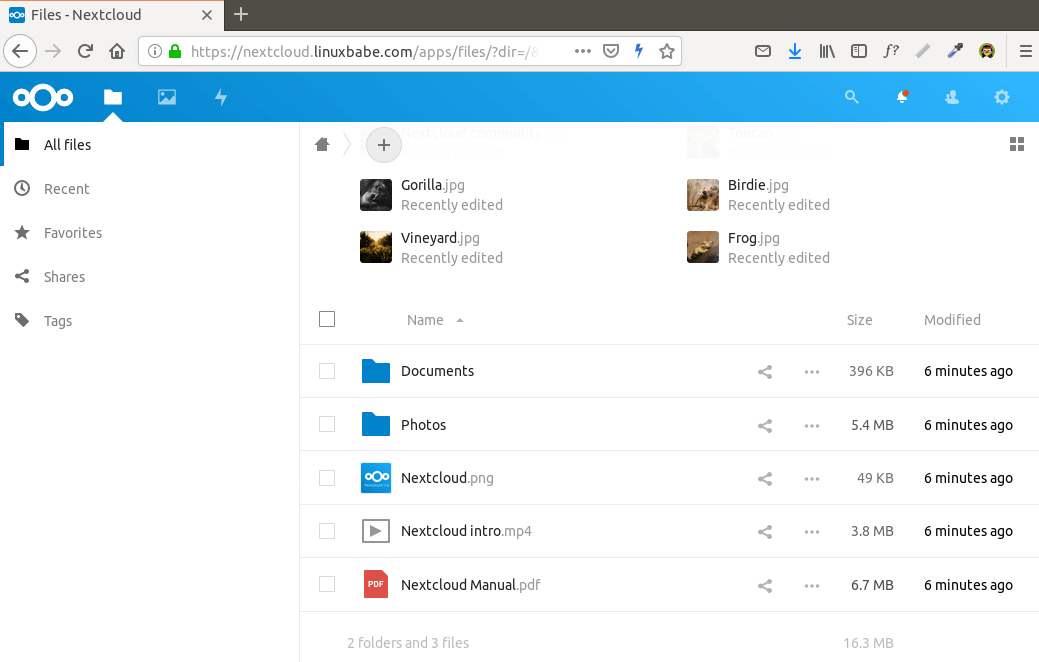
Click the Finish Setup button, you will see the Web interface of Nextcloud. Congrats! You can start using it as your private cloud storage.

How to Set up NextCloud Email Notification
If your NextCloud instance will be used by more than one person, it’s important that your NextCloud server can send transactional emails, such as password-resetting email. First, you should set an email address for your own account. Go to Settings -> Personal Info and set an email address for your account.

Then go to Settings -> Basic settings. You will find the email server settings. There are two send modes: sendmail and smtp. You can choose the sendmail mode if your NextCloud host has an SMTP server running.

If you would like to use an SMTP server running on another host, then choose smtp mode and enter the SMTP server address and login credentials like below. Choose STARTTLS for encryption.

For how to set up an email server, please check out the following tutorial. Note that I highly recommend running iRedMail mail server on a fresh clean OS. Installing iRedMail on an OS that has other web applications can fail, and likely break existing applications.
How to Reset Nextcloud User Password From Command Line
If you lost your admin account password, and you didn’t set up email delivery in Nextcloud, then you need to reset the password by running the following command on your server. Replace nextcloud_username with your real username.
sudo -u www-data php /var/www/nextcloud/occ user:resetpassword nextcloud_username
There are also other commands you might find useful. List available commands with:
sudo -u www-data php /var/www/nextcloud/occ
or
sudo -u www-data php /var/www/nextcloud/console.php
How to Move the Data Directory
In case you need to move the NextCloud data directory, there are 4 steps to accomplish this. First, you need to use the cp command to copy the data directory to the new directory. For example, the mount point of my external hard drive is /media/linuxbabe/b43e4eea-9796-4ac6-9c48-2bcaa46353731. I create the new data directory on the external hard drive.
sudo mkdir /media/linuxbabe/b43e4eea-9796-4ac6-9c48-2bcaa46353731/nextcloud-data/
Then I copy the original data directory to the new data directory. -R flag means the copy operation is recursive.
sudo cp /var/www/nextcloud-data/* /media/linuxbabe/b43e4eea-9796-4ac6-9c48-2bcaa46353731/nextcloud-data/ -R
You also need to copy the .ocdata file.
sudo cp /var/www/nextcloud-data/.ocdata /media/linuxbabe/b43e4eea-9796-4ac6-9c48-2bcaa46353731/nextcloud-data/
Next, you need to set www-data (Apache user) as the owner.
sudo chown www-data:www-data /media/linuxbabe/b43e4eea-9796-4ac6-9c48-2bcaa46353731/nextcloud-data/ -R
Lastly, you need to edit the config.php file.
sudo nano /var/www/nextcloud/config/config.php
Find the following line and change the value of datadirectory.
'datadirectory' => '/var/www/nextcloud-data',
Save and close the file. Reload NextCloud web page and you are done.
Step 7: Increase PHP Memory Limit
The default PHP memory limit is 128MB. NextCloud recommends 512MB for better performance. To change PHP memory limit, edit the php.ini file.
sudo nano /etc/php/7.4/apache2/php.ini
Find the following line. (line 409)
memory_limit = 128M
Change the value.
memory_limit = 512M
Save and close the file. Alternatively, you can run the following command to change the value without manually opening the file.
sudo sed -i 's/memory_limit = 128M/memory_limit = 512M/g' /etc/php/7.4/apache2/php.ini
Then reload Apache for the changes to take effect.
sudo systemctl reload apache2
If your server has the /etc/php7.4/fpm/php.ini file, that means your server also runs PHP-FPM. I recommend changing the memory_limit in PHP-FPM as well.
sudo nano /etc/php/7.4/fpm/php.ini
Find the memory_limit parameter and change the value. After saving the file, reload PHP-FPM for the change to take effect.
sudo systemctl reload php7.4-fpm
Step 8: Configure Redis Cache for NextCloud
If you go to your NextCloud settings -> overview page, you might see the following warning:
No memory cache has been configured. To enhance your performance please configure a memcache if available.
We will enable memory caching for nextCloud by using Redis. Run the following command to install Redis server from Ubuntu repository.
sudo apt install redis-server
You can check the version with:
redis-server -v
Sample output:
Redis server v=5.0.7 sha=00000000:0 malloc=jemalloc-5.2.1 bits=64 build=636cde3b5c7a3923
Now we can check if redis server is running.
systemctl status redis

Hint: If the above command didn’t quit immediately, you can press the Q key to gain back control of the terminal.
From the above screenshot, we can see that it’s running and auto-start is enabled. If for any reason it’s not running, execute the following command:
sudo systemctl start redis-server
And if auto-start at boot time is not enabled, you can use the following command to enable it:
sudo systemctl enable redis-server
In order to configure Redis as a cache for nextCloud, we need to install the PHP extension for interfacing with Redis.
sudo apt install php-redis
Check if the extension is enabled.
php --ri redis

We can see that Redis extension is enabled. If it’s not enabled, run the following command:
sudo phpenmod redis
You may also need to reload Apache if the redis extension is still not enabled.
sudo systemctl reload apache2
Next, edit nextCloud configuration file.
sudo nano /var/www/nextcloud/config/config.php
Add the following lines above the ending ); line.
'memcache.distributed' => '\OC\Memcache\Redis',
'memcache.local' => '\OC\Memcache\Redis',
'memcache.locking' => '\OC\Memcache\Redis',
'redis' => array(
     'host' => 'localhost',
     'port' => 6379,
     ),

Save and close the file. Then restart Apache and PHP-FPM.
sudo systemctl restart apache2 php7.4-fpm
Now go to NextCloud settings -> overview page again and refresh the web page, the warning about memory caching should be gone.
Adding Missing Indexes
If you see the following message in the NextCloud Settings -> Overview page,
The database is missing some indexes. Due to the fact that adding indexes on big tables could take some time they were not added automatically.
Then you need to manually add those indexes. Change to the Nextcloud webroot directory.
cd /var/www/nextcloud/
Run the following command to add indexes to the Nextcloud database.
sudo -u www-data php occ db:add-missing-indices

Now if you refresh the NextCloud Settings -> Overview page, the warning about missing indexes should be gone.
Conversion to Big Int
If you see the following message in the NextCloud Settings -> Overview page,
Some columns in the database are missing a conversion to big int. Due to the fact that changing column types on big tables could take some time they were not changed automatically.
Then you need to manually change the column type. Change to the Nextcloud webroot directory.
cd /var/www/nextcloud/
Change your Nextcloud into maintenance mode to prevent users from logging in and making changes.
sudo -u www-data php occ maintenance:mode --on
Then run the following command to change the column type.
sudo -u www-data php occ db:convert-filecache-bigint
Once it’s done, switch off the maintenance mode.
sudo -u www-data php occ maintenance:mode --off

Now if you refresh the NextCloud Settings -> Overview page, the warning about big int should be gone.
How to Install NextCloud Client on Ubuntu 20.04 Desktop
Run the following commands on Ubuntu 20.04 desktop to install the client from the default repository.
sudo apt install nextcloud-client
NextCloud Client on Ubuntu 20.04

Client software for macOS, Windows, Android and iOS can be found on the Nextcloud download page.
How to Enable OnlyOffice/Collabora Online
By default, Nextcloud ships with support for OnlyOffice, which an online office suite that allows you to edit your doc, ppt, xls files directly from NextCloud. We only need to install an app to use this feature. Go to Nextcloud Apps -> Office & Text. Find and enable the community document server app.

Now when you click the add button (+) in Nextcloud, you will be able to create Word, spreadsheet and presentation documents right from your Nextcloud server.


However, I found this app isn’t very reliable. And the community edition allows only 20 users at most. You need to purchase an enterprise edition if you have more than 20 users. There’s another open-source LibreOffice-based online office suite called Collabora Online that has the same functionality, but without the limitation on the number of users. You can read the following article to integrate it with Nextcloud.
Increase Upload File Size Limit
If you use the Apache PHP module to run PHP script, then there’s no upload file size limit. If you use PHP-FPM to run PHP script, you need to change the file size limit. The default maximum file size for uploading in PHP-FPM is 2MB. To increase the upload size limit, edit the PHP configuration file.
sudo nano /etc/php/7.4/fpm/php.ini
Find the following line (line 846).
upload_max_filesize = 2M
Change the value like below:
upload_max_filesize = 1024M
Save and close the file. Alternatively, you can run the following command to change the value without manually opening the file.
sudo sed -i 's/upload_max_filesize = 2M/upload_max_filesize = 1024M/g' /etc/php/7.4/fpm/php.ini
Then restart PHP-FPM.
sudo systemctl restart php7.4-fpm
Enabling HTTP/2 Protocol
HTTP/2 protocol can greatly improve page loading speed. You can read the following guide to enable HTTP/2 protocol on Apache.
Adding Local DNS Entry
It’s recommended to edit the /etc/hosts file on your Nextcloud server and add the following entry, so that Nextcloud itself won’t have to query the public DNS, which can improve the overall stability. If your Nextcloud server can’t resolve the nextcloud.example.com hostname, then you may encounter a 504 gateway time out error.
127.0.0.1 localhost nextcloud.example.com
An IP address in the /etc/hosts file can have multiple hostnames, so if you have other applications installed on the same box, you can also add other hostnames or sub-domains on the same line like this:
127.0.0.1 localhost focal ubuntu nextcloud.example.com collabora.example.com
Using Cron to Run Background Jobs
By default, Nextcloud uses AJAX to execute one task with each page load. You can use the more efficient system cron service to run background jobs. Go to Nextcloud Settings -> Basic Settings and select Cron.

Next, edit the www-data user’s crontab file.
sudo -u www-data crontab -e
Add the following line in this file, so the cron job will run every 5 minutes.
*/5 * * * * php7.4 -f /var/www/nextcloud/cron.php
Save and close the file.
Install NextCloud on Ubuntu 20.04 with Nginx (LEMP Stack)
This tutorial will be showing you how to install NextCloud on Ubuntu 20.04 LTS with Nginx web server.
What’s NextCloud?
NextCloud is a free open-source self-hosted cloud storage solution. It’s functionally similar to Dropbox. Proprietary cloud storage solutions (Dropbox, Google Drive, etc) are convenient, but at a price: they can be used to collect personal data because your files are stored on their computers. If you worried about privacy, you can switch to NextCloud, which you can install on your private home server or on a virtual private server (VPS). You can upload your files to your server via NextCloud and then sync those files to your desktop computer, laptop or smartphone. This way you have full control of your data.
NextCloud Features
- Free and open-source
- End-to-end encryption, meaning files can be encrypted on client devices before uploaded to the server, so even if someone steals your server, they can not read your files.
- Can be integrated with an online office suite (Collobora Online, OnlyOffice) so you can create and edit your doc, ppt, xls files directly from NextCloud.
- The app store contains hundreds of apps to extend functionality (like calendar app, contacts app, note-taking app, video conferencing app, etc).
- The sync client is available on Linux, macOS, Windows, iOS and android.
Prerequisites
NextCloud is written in PHP programing language. To follow this tutorial, you first need to install LEMP stack on Ubuntu 20.04. If you haven’t already done so, please check out the following tutorial.
You can install NextCloud on your home server or a VPS (virtual private server). You also need a domain name, so later on your will be able to enable HTTPS to encrypt the HTTP traffic. I registered my domain name from NameCheap because the price is low and they give whois privacy protection free for life. Nextcloud can be installed without a domain name, but it really doesn’t make sense if you don’t encrypt the HTTP connection to prevent snooping. I recommend buying a domain name, if you really want to tinker with server software and use them to the fullest potential.
Now let’s install NextCloud.
Step 1: Download NextCloud on Ubuntu 20.04
Log into your Ubuntu 20.04 server. Then download the NextCloud zip archive onto your server. The latest stable version is 21.0.1 at time of this writing. You may need to change the version number. Go to https://nextcloud.com/install and click the download for server button to see the latest version.
You can run the following command to download it on your server.
wget https://download.nextcloud.com/server/releases/nextcloud-21.0.1.zipYou can always use the above URL format to download NextCloud. If a new version comes out, simply replace 21.0.1 with the new version number.
Once downloaded, extract the archive with unzip.
sudo apt install unzip

sudo unzip nextcloud-21.0.1.zip -d /usr/share/nginx/
The -d option specifies the target directory. NextCloud web files will be extracted to /usr/share/nginx/nextcloud/. Then we need to change the owner of this directory to www-data so that the web server (Nginx) can write to this directory.
sudo chown www-data:www-data /usr/share/nginx/nextcloud/ -RStep 2: Create a Database and User for Nextcloud in MariaDB Database Server
Log into MariaDB database server with the following command. Since MariaDB is now using unix_socket plugin to authentication user login, there’s no need to enter MariaDB root password. We just need to prefix the mysql command with sudo.
sudo mysqlThen create a database for Nextcloud. This tutorial name the database nextcloud. You can use whatever name you like.
create database nextcloud;Create the database user. Again, you can use your preferred name for this user. Replace your-password with your preferred password.
create user nextclouduser@localhost identified by 'your-password';Grant this user all privileges on the nextcloud database.
grant all privileges on nextcloud.* to nextclouduser@localhost identified by 'your-password';Flush privileges and exit.
flush privileges;

exit;
Step 3: Create a Nginx Config File for Nextcloud
Create a nextcloud.conf file in /etc/nginx/conf.d/ directory, with a command-line text editor like Nano.
sudo nano /etc/nginx/conf.d/nextcloud.confCopy and paste the following text into the file. Replace nextcloud.example.com with your own preferred sub-domain. Don’t forget to create DNS A record for this sub-domain in your DNS zone editor. If you don’t have a real domain name, I recommend going to NameCheap to buy one. The price is low and they give whois privacy protection free for life.
server {
    listen 80;
    listen [::]:80;
    server_name nextcloud.example.com;

    # Add headers to serve security related headers
    add_header X-Content-Type-Options nosniff;
    add_header X-XSS-Protection "1; mode=block";
    add_header X-Robots-Tag none;
    add_header X-Download-Options noopen;
    add_header X-Permitted-Cross-Domain-Policies none;
    add_header Referrer-Policy no-referrer;

    #I found this header is needed on Ubuntu, but not on Arch Linux.
    add_header X-Frame-Options "SAMEORIGIN";

    # Path to the root of your installation
    root /usr/share/nginx/nextcloud/;

    access_log /var/log/nginx/nextcloud.access;
    error_log /var/log/nginx/nextcloud.error;

    location = /robots.txt {
        allow all;
        log_not_found off;
        access_log off;
    }

    # The following 2 rules are only needed for the user_webfinger app.
    # Uncomment it if you're planning to use this app.
    #rewrite ^/.well-known/host-meta /public.php?service=host-meta last;
    #rewrite ^/.well-known/host-meta.json /public.php?service=host-meta-json
    # last;

    location = /.well-known/carddav {
        return 301 $scheme://$host/remote.php/dav;
    }
    location = /.well-known/caldav {
       return 301 $scheme://$host/remote.php/dav;
    }

    location ~ /.well-known/acme-challenge {
      allow all;
    }

    # set max upload size
    client_max_body_size 512M;
    fastcgi_buffers 64 4K;

    # Disable gzip to avoid the removal of the ETag header
    gzip off;

    # Uncomment if your server is build with the ngx_pagespeed module
    # This module is currently not supported.
    #pagespeed off;

    error_page 403 /core/templates/403.php;
    error_page 404 /core/templates/404.php;

    location / {
       rewrite ^ /index.php;
    }

    location ~ ^/(?:build|tests|config|lib|3rdparty|templates|data)/ {
       deny all;
    }
    location ~ ^/(?:\.|autotest|occ|issue|indie|db_|console) {
       deny all;
     }

    location ~ ^/(?:index|remote|public|cron|core/ajax/update|status|ocs/v[12]|updater/.+|ocs-provider/.+|core/templates/40[34])\.php(?:$|/) {
       include fastcgi_params;
       fastcgi_split_path_info ^(.+\.php)(/.*)$;
       try_files $fastcgi_script_name =404;
       fastcgi_param SCRIPT_FILENAME $document_root$fastcgi_script_name;
       fastcgi_param PATH_INFO $fastcgi_path_info;
       #Avoid sending the security headers twice
       fastcgi_param modHeadersAvailable true;
       fastcgi_param front_controller_active true;
       fastcgi_pass unix:/run/php/php7.4-fpm.sock;
       fastcgi_intercept_errors on;
       fastcgi_request_buffering off;
    }

    location ~ ^/(?:updater|ocs-provider)(?:$|/) {
       try_files $uri/ =404;
       index index.php;
    }

    # Adding the cache control header for js and css files
    # Make sure it is BELOW the PHP block
    location ~* \.(?:css|js)$ {
        try_files $uri /index.php$uri$is_args$args;
        add_header Cache-Control "public, max-age=7200";
        # Add headers to serve security related headers (It is intended to
        # have those duplicated to the ones above)
        add_header X-Content-Type-Options nosniff;
        add_header X-XSS-Protection "1; mode=block";
        add_header X-Robots-Tag none;
        add_header X-Download-Options noopen;
        add_header X-Permitted-Cross-Domain-Policies none;
        add_header Referrer-Policy no-referrer;
        # Optional: Don't log access to assets
        access_log off;
   }

   location ~* \.(?:svg|gif|png|html|ttf|woff|ico|jpg|jpeg)$ {
        try_files $uri /index.php$uri$is_args$args;
        # Optional: Don't log access to other assets
        access_log off;
   }
}
Save and close the file. (To save a file in Nano text editor, press Ctrl+O, then press Enter to confirm. To exit, press Ctrl+X.)
Then test Nginx configuration.
sudo nginx -t
If the test is successful, reload Nginx for the changes to take effect.
sudo systemctl reload nginxStep 4: Install and Enable PHP Modules
Run the following commands to install PHP modules required or recommended by NextCloud.
sudo apt install imagemagick php-imagick php7.4-common php7.4-mysql php7.4-fpm php7.4-gd php7.4-json php7.4-curl php7.4-zip php7.4-xml php7.4-mbstring php7.4-bz2 php7.4-intl php7.4-bcmath php7.4-gmpStep 5: Enable HTTPS
Now you can access the Nextcloud web install wizard in your web browser by entering the domain name for your Nextcloud installation.
nextcloud.example.com
If the web page can’t load, you probably need to open port 80 in firewall.
sudo iptables -I INPUT -p tcp --dport 80 -j ACCEPTAnd port 443 as well.
sudo iptables -I INPUT -p tcp --dport 443 -j ACCEPTBefore entering any sensitive information, we should enable secure HTTPS connection on Nextcloud. We can obtain a free TLS certificate from Let’s Encrypt. Install Let’s Encrypt client (certbot) from Ubuntu 20.04 repository.
sudo apt install certbot python3-certbot-nginxPython3-certbot-nginx is the Nginx plugin. Next, run the following command to obtain a free TLS certificate using the Nginx plugin.
sudo certbot --nginx --agree-tos --redirect --hsts --staple-ocsp --email you@example.com -d nextcloud.example.comWhere:
- –nginx: Use the Nginx authenticator and installer
- –agree-tos: Agree to Let’s Encrypt terms of service
- –redirect: Enforce HTTPS by adding 301 redirect.
- –hsts: Enable HTTP Strict Transport Security. This defends against SSL/TLS stripping attack.
- –staple-ocsp: Enable OCSP Stapling.
- –email: Email used for registration and recovery contact.
- -d flag is followed by a list of domain names, separated by comma. You can add up to 100 domain names.
You will be asked if you want to receive emails from EFF(Electronic Frontier Foundation). After choosing Y or N, your TLS certificate will be automatically obtained and configured for you, which is indicated by the message below.
I found that Certbot may not be able to add HSTS header in the Nginx config file for Nextcloud. If you would like to enable HSTS (HTTP Strict Transport Security), then edit the file.
sudo nano /etc/nginx/conf.d/nextcloud.confWe can then add the following line in the SSL server block to enable HSTS header. (If it’s already there, then your configuration are fine.)
add_header Strict-Transport-Security "max-age=31536000" always;Also, you can enable HTTP2 protocol by adding the option http2, which will speed up webpage loading.
listen 443 ssl http2; # managed by CertbotLike below.

Save and close the file. Then text Nginx configurations.
sudo nginx -tIf the test is successful, reload Nginx for the change to take effect.
sudo systemctl reload nginxThe above configuration will get A+ score on SSL test.
Step 6: Finish the Installation in your Web Browser
Now you can access the Nextcloud web install wizard using HTTPS connection.
https://nextcloud.example.comTo complete the installation, you need to create an admin account, enter the path of Nextcloud data folder, enter database details you created in step 2. You can use the default localhost as host address, or you can enter localhost:3306, as MariaDB listens on port 3306.
The data folder is where users’ files are stored. For security, it’s best to place the data directory outside of Nextcloud webroot directory. So instead of storing users’ files under /usr/share/nginx/nextcloud/data/, we can change it to /usr/share/nginx/nextcloud-data. which can be created with the following command:
sudo mkdir /usr/share/nginx/nextcloud-dataThen make sure Nginx user (www-data) has write permission to the data directory.
sudo chown www-data:www-data /usr/share/nginx/nextcloud-data -R
Click the Finish Setup button, you will see the Web interface of Nextcloud. Congrats! You can start using it as your private cloud storage.


How to Set up NextCloud Email Notification
If your NextCloud instance will be used by more than one person, it’s important that your NextCloud server can send transactional emails, such as password-resetting email. First, you should set an email address for your own account. Go to Settings -> Personal Info and set an email address for your account.
Then go to Settings -> Basic settings. You will find the email server settings. There are two send modes: sendmail and smtp. You can choose the sendmail mode if your NextCloud host has an SMTP server running.
If you would like to use an SMTP server running on another host, then choose smtp mode and enter the SMTP server address and login credentials like below. Choose STARTTLS for encryption.
For how to set up an email server, please check out the following tutorial. Note that I highly recommend running iRedMail mail server on a fresh clean OS. Installing iRedMail on an OS that has other web applications can fail, and likely break existing applications.
How to Reset Nextcloud User Password From Command Line
If you lost your admin account password, and you didn’t set up email delivery in Nextcloud, then you need to reset the password by running the following command on your server. Replace nextcloud_username with your real username.
sudo -u www-data php /usr/share/nginx/nextcloud/occ user:resetpassword nextcloud_usernameThere are also other commands you might find useful. List available commands with:
sudo -u www-data php /usr/share/nginx/nextcloud/occor
sudo -u www-data php /usr/share/nginx/nextcloud/console.phpHow to Move the Data Directory
In case you need to move the NextCloud data directory, there are 4 steps to accomplish this. First, you need to use the cp command to copy the data directory to the new directory. For example, the mount point of my external hard drive is /media/linuxbabe/b43e4eea-9796-4ac6-9c48-2bcaa46353731. I create the new data directory on the external hard drive.
sudo mkdir /media/linuxbabe/b43e4eea-9796-4ac6-9c48-2bcaa46353731/nextcloud-data/Then I copy the original data directory to the new data directory. -R flag means the copy operation is recursive.
sudo cp /usr/share/nginx/nextcloud-data/* /media/linuxbabe/b43e4eea-9796-4ac6-9c48-2bcaa46353731/nextcloud-data/ -RYou also need to copy the .ocdata file.
sudo cp /usr/share/nginx/nextcloud-data/.ocdata /media/linuxbabe/b43e4eea-9796-4ac6-9c48-2bcaa46353731/nextcloud-data/Next, you need to set www-data (Nginx user) as the owner.
sudo chown www-data:www-data /media/linuxbabe/b43e4eea-9796-4ac6-9c48-2bcaa46353731/nextcloud-data/ -RLastly, you need to edit the config.php file.
sudo nano /usr/share/nginx/nextcloud/config/config.phpFind the following line and change the value of datadirectory.
'datadirectory' => '/usr/share/nginx/nextcloud-data',Save and close the file. Reload NextCloud web page and you are done.
Step 7: Increase PHP Memory Limit
The default PHP memory limit is 128MB. NextCloud recommends 512MB for better performance. To change PHP memory limit, edit the php.ini file.
sudo nano /etc/php/7.4/fpm/php.iniFind the following line. (line 409)
memory_limit = 128MChange the value.
memory_limit = 512MSave and close the file. Alternatively, you can run the following command to change the value without manually opening the file.
sudo sed -i 's/memory_limit = 128M/memory_limit = 512M/g' /etc/php/7.4/fpm/php.iniThen reload PHP-FPM service for the changes to take effect.
sudo systemctl reload php7.4-fpmStep 8: Set Up PHP to Properly Query System Environment Variables
Edit the www.conf file.
sudo nano /etc/php/7.4/fpm/pool.d/www.confFind the following line (line 396).
;clear_env = noRemove the semicolon to uncomment this line.
clear_env = noSave and close the file. Alternatively, you can run the following command to uncomment this line without manually opening the file.
sudo sed -i 's/;clear_env = no/clear_env = no/g' /etc/php/7.4/fpm/pool.d/www.confThen reload PHP-FPM service for the changes to take effect.
sudo systemctl reload php7.4-fpmStep 9: Increase Upload File Size Limit
The default maximum upload file size limit set by Nginx is 1MB. To allow uploading large files to your NextCloud server, edit the Nginx configuration file for NextCloud.
sudo nano /etc/nginx/conf.d/nextcloud.confWe have already set the maximum file size in this file, as indicated by
client_max_body_size 512M;You can change it if you prefer, like 1G.
client_max_body_size 1024M;Save and close the file. Then reload Nginx for the changes to take effect.
sudo systemctl reload nginxPHP also sets a limit of upload file size. The default maximum file size for uploading is 2MB. To increase the upload size limit, edit the PHP configuration file.
sudo nano /etc/php/7.4/fpm/php.iniFind the following line (line 846).
upload_max_filesize = 2MChange the value like below:
upload_max_filesize = 1024MSave and close the file. Alternatively, you can run the following command to change the value without manually opening the file.
sudo sed -i 's/upload_max_filesize = 2M/upload_max_filesize = 1024M/g' /etc/php/7.4/fpm/php.iniThen restart PHP-FPM.
sudo systemctl restart php7.4-fpmStep 10: Configure Redis Cache for NextCloud
If you go to your NextCloud settings -> overview page, you might see the following warning:
No memory cache has been configured. To enhance your performance please configure a memcache if available.We will enable memory caching for nextCloud by using Redis. Run the following command to install Redis server from Ubuntu repository.
sudo apt install redis-serverYou can check the version with:
redis-server -vSample output:
Redis server v=5.0.7 sha=00000000:0 malloc=jemalloc-5.2.1 bits=64 build=636cde3b5c7a3923Now we can check if redis server is running.
systemctl status redis
Hint: If the above command didn’t quit immediately, you can press the Q key to gain back control of the terminal.
From the above screenshot, we can see that it’s running and auto-start is enabled. If for any reason it’s not running, execute the following command:
sudo systemctl start redis-serverAnd if auto-start at boot time is not enabled, you can use the following command to enable it:
sudo systemctl enable redis-serverIn order to configure Redis as a cache for nextCloud, we need to install the PHP extension for interfacing with Redis.
sudo apt install php-redisCheck if the extension is enabled.
php --ri redis
We can see that Redis extension is enabled. If it’s not enabled, run the following command:
sudo phpenmod redisNext, edit nextCloud configuration file.
sudo nano /usr/share/nginx/nextcloud/config/config.phpAdd the following lines above the ending ); line.
'memcache.distributed' => '\OC\Memcache\Redis',
'memcache.local' => '\OC\Memcache\Redis',
'memcache.locking' => '\OC\Memcache\Redis',
'redis' => array(
     'host' => 'localhost',
     'port' => 6379,
     ),
Save and close the file. Then restart Nginx and PHP-FPM.
sudo systemctl restart nginx php7.4-fpmNow go to NextCloud settings -> overview page again and refresh the web page, the warning about memory caching should be gone.
Adding Missing Indexes
If you see the following message in the NextCloud Settings -> Overview page,
The database is missing some indexes. Due to the fact that adding indexes on big tables could take some time they were not added automatically.Then you need to manually add those indexes. Change to the Nextcloud webroot directory.
cd /usr/share/nginx/nextcloud/Run the following command to add indexes to the Nextcloud database.
sudo -u www-data php occ db:add-missing-indices
Now if you refresh the NextCloud Settings -> Overview page, the warning about missing indexes should be gone.
Conversion to Big Int
If you see the following message in the NextCloud Settings -> Overview page,
Some columns in the database are missing a conversion to big int. Due to the fact that changing column types on big tables could take some time they were not changed automatically.Then you need to manually change the column type. Change to the Nextcloud webroot directory.
cd /usr/share/nginx/nextcloud/Change your Nextcloud into maintenance mode to prevent users from logging in and making changes.
sudo -u www-data php occ maintenance:mode --onThen run the following command to change the column type.
sudo -u www-data php occ db:convert-filecache-bigintOnce it’s done, switch off the maintenance mode.
sudo -u www-data php occ maintenance:mode --off
Now if you refresh the NextCloud Settings -> Overview page, the warning about big int should be gone.
Install NextCloud on CentOS 8/RHEL 8 with Nginx (LEMP Stack)
This tutorial will be showing you how to install NextCloud on RHEL 8/CentOS 8 with Nginx web server.
What’s NextCloud?
NextCloud is a free open-source self-hosted cloud storage solution. It’s functionally similar to Dropbox. Proprietary cloud storage solutions (Dropbox, Google Drive, etc) are convenient, but at a price: they can be used to collect personal data because your files are stored on their computers. If you worried about privacy, you can switch to NextCloud, which you can install on your private home server or on a virtual private server (VPS). You can upload your files to your server via NextCloud and then sync those files to your desktop computer, laptop or smart phone. This way you have full control of your data.
NextCloud Features
- Free and open-source
- End-to-end encryption, meaning files can be encrypted on client device before uploaded to the server, so even if someone steals your server, they can not see your files.
- Can be integrated with an online office suite (Collobora, OnlyOffice) so you can create and edit your doc, ppt, xls files directly from NextCloud.
- The app store contains hundreds of apps to extend functionality (like calendar app, notes-taking app, video conferencing app, etc).
- The sync client are available on Linux, MacOS, Windows, iOS and android.
Prerequisites
NextCloud is written in PHP programing language. To follow this tutorial, you first need to install LEMP stack on RHEL 8/CentOS 8. If you haven’t already done so, please check out the following tutorial.
You can install NextCloud on your home server or a VPS (virtual private server). You also need a domain name. I registered my domain name from NameCheap because the price is low and they give whois privacy protection free for life. Nextcloud can be installed without a domain name, but it doesn’t make sense if you don’t encrypt the HTTP connection to prevent snooping. I recommend buying a domain name, if you really want to tinker with server software and use them to the fullest potential.
This tutorial uses root account to manage administration tasks. To switch to root, run the following command and enter root password.
su -Now let’s install NextCloud on the server.
Step 1: Download NextCloud on RHEL 8/CentOS 8 Server
Log into your RHEL 8/CentOS 8 server. Then download the NextCloud zip archive onto your server. The latest stable version is 14.0.4 at time of this writing. You may need to change the version number. Go to https://nextcloud.com/install and click the download server button to see the latest version.

You can use the wget tool to download it from command line. The download link is always available in the format below. If a new version comes out, simply replace 14.0.4 with the new version number.
yum install wget

wget https://download.nextcloud.com/server/releases/nextcloud-14.0.4.zip
Once downloaded, extract the archive with unzip.
yum install unzip

unzip nextcloud-14.0.4.zip -d /usr/share/nginx/
The -d option specifies the target directory. NextCloud web files will be extracted to /usr/share/nginx/nextcloud/. Then we need to change the owner of this directory to nginx so that Nginx web server can write to this directory.
chown nginx:nginx /usr/share/nginx/nextcloud/ -RStep 2: Create a Database and User in MariaDB
Log into MariaDB database server with the following command. You will need to enter the MariaDB root password to login.
mysql -u root -pThen create a database for Nextcloud. This tutorial name the database nextcloud. You can use whatever name you like.
CREATE DATABASE nextcloud DEFAULT CHARACTER SET utf8mb4 COLLATE utf8mb4_general_ci;Create the database user. Again, you can use your preferred name for this user. Replace your-password with your preferred password.
CREATE USER nextclouduser@localhost IDENTIFIED BY 'your-password';Grant this user all privileges on the nextcloud database.
GRANT ALL PRIVILEGES ON nextcloud.* TO nextclouduser@localhost;Flush privileges and exit.
flush privileges;

exit;
Step 3: Create a Nginx Config File for Nextcloud
Create a nextcloud.conf file in /etc/nginx/conf.d/ directory. I use the Nano command line text editor in this article.
nano /etc/nginx/conf.d/nextcloud.confPut the following text into the file. Replace the red-colored text with your actual data. In your DNS manager, create a sub-domain for your NextCloud server like nextcloud.your-domain.com and don’t forget to set A record for the sub-domain.
server {
    listen 80;
    listen [::]:80;
    server_name nextcloud.your-domain.com;

    # Add headers to serve security related headers
    add_header X-Content-Type-Options nosniff;
    add_header X-XSS-Protection "1; mode=block";
    add_header X-Robots-Tag none;
    add_header X-Download-Options noopen;
    add_header X-Permitted-Cross-Domain-Policies none;
    add_header Referrer-Policy no-referrer;

    #I found this header is needed on Debian/Ubuntu/CentOS/RHEL, but not on Arch Linux.
    add_header X-Frame-Options "SAMEORIGIN";

    # Path to the root of your installation
    root /usr/share/nginx/nextcloud/;

    access_log /var/log/nginx/nextcloud.access;
    error_log /var/log/nginx/nextcloud.error;

    location = /robots.txt {
        allow all;
        log_not_found off;
        access_log off;
    }

    # The following 2 rules are only needed for the user_webfinger app.
    # Uncomment it if you're planning to use this app.
    #rewrite ^/.well-known/host-meta /public.php?service=host-meta last;
    #rewrite ^/.well-known/host-meta.json /public.php?service=host-meta-json
    # last;

    location = /.well-known/carddav {
        return 301 $scheme://$host/remote.php/dav;
    }
    location = /.well-known/caldav {
       return 301 $scheme://$host/remote.php/dav;
    }

    location ~ /.well-known/acme-challenge {
      allow all;
    }

    # set max upload size
    client_max_body_size 512M;
    fastcgi_buffers 64 4K;

    # Disable gzip to avoid the removal of the ETag header
    gzip off;

    # Uncomment if your server is build with the ngx_pagespeed module
    # This module is currently not supported.
    #pagespeed off;

    error_page 403 /core/templates/403.php;
    error_page 404 /core/templates/404.php;

    location / {
       rewrite ^ /index.php;
    }

    location ~ ^/(?:build|tests|config|lib|3rdparty|templates|data)/ {
       deny all;
    }
    location ~ ^/(?:\.|autotest|occ|issue|indie|db_|console) {
       deny all;
     }

    location ~ ^/(?:index|remote|public|cron|core/ajax/update|status|ocs/v[12]|updater/.+|ocs-provider/.+|core/templates/40[34])\.php(?:$|/) {
       include fastcgi_params;
       fastcgi_split_path_info ^(.+\.php)(/.*)$;
       try_files $fastcgi_script_name =404;
       fastcgi_param SCRIPT_FILENAME $document_root$fastcgi_script_name;
       fastcgi_param PATH_INFO $fastcgi_path_info;
       #Avoid sending the security headers twice
       fastcgi_param modHeadersAvailable true;
       fastcgi_param front_controller_active true;
       fastcgi_pass unix:/run/php-fpm/www.sock;
       fastcgi_intercept_errors on;
       fastcgi_request_buffering off;
    }

    location ~ ^/(?:updater|ocs-provider)(?:$|/) {
       try_files $uri/ =404;
       index index.php;
    }

    # Adding the cache control header for js and css files
    # Make sure it is BELOW the PHP block
    location ~* \.(?:css|js)$ {
        try_files $uri /index.php$uri$is_args$args;
        add_header Cache-Control "public, max-age=7200";
        # Add headers to serve security related headers (It is intended to
        # have those duplicated to the ones above)
        add_header X-Content-Type-Options nosniff;
        add_header X-XSS-Protection "1; mode=block";
        add_header X-Robots-Tag none;
        add_header X-Download-Options noopen;
        add_header X-Permitted-Cross-Domain-Policies none;
        # Optional: Don't log access to assets
        access_log off;
   }

   location ~* \.(?:svg|gif|png|html|ttf|woff|ico|jpg|jpeg)$ {
        try_files $uri /index.php$uri$is_args$args;
        # Optional: Don't log access to other assets
        access_log off;
   }
}
In nano text editor, press Ctrl+O to save the file. Then press Enter to confirm. Press Ctrl+X to exit. Then test Nginx configuration.
nginx -tIf the test is successful, reload Nginx for the changes to take effect.
systemctl reload nginxStep 4: Install and Enable PHP Modules
Run the following commands to install PHP modules required or recommended by NextCloud.
yum install php-common php-gd php-json php-curl php-zip php-xml php-mbstring php-bz2 php-intlWe also need to tell SELinux (Security Enhenced Linux) to allow PHP-FPM to use execmem.
setsebool -P httpd_execmem 1Then reload PHP-FPM
systemctl reload php-fpmStep 5: Setting up Permissions
First, tell SELinux to allow Nginx and PHP-FPM to read and write to the /usr/share/nginx/nextcloud/ directory.
chcon -t httpd_sys_rw_content_t /usr/share/nginx/nextcloud/ -RBy default, SELinux forbids Nginx to make network requests to other servers, but later Nginx needs to request TLS certificate status from Let’s Encrypt CA server, so we need to tell SELinux to allow Nginx with the following command.
setsebool -P httpd_can_network_connect 1By default, there are 3 files in /var/lib/php/ directory whose group owner are set to apache, but we are using Nginx. So we need to give the nginx user permissions to read and write to the 3 directories with setfacl.
setfacl -R -m u:nginx:rwx /var/lib/php/opcache/
setfacl -R -m u:nginx:rwx /var/lib/php/session/
setfacl -R -m u:nginx:rwx /var/lib/php/wsdlcache/
Step 6: Enable HTTPS
Now you can access the Nextcloud web install wizard in your browser by entering the domain name for your Nextcloud installation.
nextcloud.your-domain.com
If the web page can’t load, you probably need to open port 80 in firewall.
firewall-cmd --permanent --zone=public --add-service=httpAnd port 443 as well.
firewall-cmd --permanent --zone=public --add-service=httpsThe --permanent option will make this firewall rule persistent across system reboots. Next, reload the firewall daemon for the change to take effect.
systemctl reload firewalldNow the NextCloud install wizard should be loaded successfully. Before entering any sensitive information, we should enable secure HTTPS connection on Nextcloud. We can obtain a free TLS certificate from Let’s Encrypt.
Download Let’s Encrypt client certbot-auto from EFF website.
wget https://dl.eff.org/certbot-autoGive execute permission.
chmod a+x certbot-autoMove it to user’s PATH, like /usr/local/bin/ and rename it to certbot.
sudo mv certbot-auto /usr/local/bin/certbotSet root as the owner and change the permission to 0755.
sudo chown root /usr/local/bin/certbot

sudo chmod 0755 /usr/local/bin/certbot
Now we can use certbot command to obtain a free TLS certificate using the Nginx plugin.
sudo /usr/local/bin/certbot --nginx --agree-tos --redirect --hsts --staple-ocsp --email your-email-address -d nextcloud.your-domain.comWhere:
- –nginx: Use the Nginx authenticator and installer
- –agree-tos: Agree to Let’s Encrypt terms of service
- –redirect: Add 301 redirect so that HTTP requests will be redirected to HTTPS.
- –hsts: Add the Strict-Transport-Security header to every HTTP response.
- –staple-ocsp: Enables OCSP Stapling to improve performance and user privacy.
- -d flag is followed by a list of domain names, separated by comma. You can add up to 100 domain names.
- –email: Email used for registration and recovery contact.
If this is a first run on RHEL 8/CentOS 8 system, you may be asked to install some dependency packages. Press y to continue.

You will be asked if you want to receive emails from EFF(Electronic Frontier Foundation). After choosing Y or N, your TLS certificate will be automatically obtained and configured for you, which is indicated by the message below.

Finish the Installation in your Web Browser
Now you can access the Nextcloud web install wizard using HTTPS connection. To complete the installation, you need to create an admin account, enter the path of Nextcloud data folder, enter database details created earlier. You can use the default localhost as host address, or you can enter localhost:3306, as MariaDB listens on port 3306.
The data folder is where users’ files are stored. For security, it’s best to place the data directory outside of Nextcloud web root. So instead of storing users’ files under /usr/share/nginx/nextcloud/data/, we can change it to /usr/share/nginx/nextcloud-data. which can be created with the following command:
mkdir /usr/share/nginx/nextcloud-dataThen make sure Nginx user has write permission to the data directory.
chown nginx:nginx /usr/share/nginx/nextcloud-data -R
chcon -t httpd_sys_rw_content_t /usr/share/nginx/nextcloud-data/ -R
Once it’s done, you will see the Web interface of Nextcloud. Congrats! You can start using it as your private cloud storage.

How to Set up NextCloud Email Notification
If your NextCloud instance will be used by more than one person, it’s important that your NextCloud server can send transactional emails, such as password-resetting email. To configure email settings, go to Settings -> Basic settings. You will find the email server settings.
There are two send modes: sendmail and smtp. The sendmail mode is available if your NextCloud host has a SMTP server running.

If you would like to use a SMTP server running on another host, then choose smtp mode and enter the login credentials like below.

You also need to tell SELinux to allow Nginx to send mail with the following command.
setsebool -P httpd_can_sendmail onFor how to set up your own email server, read the following tutorial:
Increase Upload File Size Limit
The default maximum upload file size limit set by Nginx is 1MB. To allow uploading large files to your NextCloud server, edit the Nginx configuration file for NextCloud.
nano /etc/nginx/conf.d/nextcloud.confWe have already set the maximum file size in this file, as indicated by
client_max_body_size 512M;You can change it if you prefer, like 1G.
client_max_body_size 1024M;Save and close the file. Then reload Nginx for the changes to take effect.
systemctl reload nginxPHP also sets a limit of upload file size. The default maximum file size for uploading is 2MB. To increase the upload size limit, edit the PHP configuration file.
nano /etc/php.iniFind the following line (line 827).
upload_max_filesize = 2MChange the value like below:
upload_max_filesize = 1024MSave and close the file. Alternatively, you can run the following command to change the value without manually opening the file.
sed -i 's/upload_max_filesize = 2M/upload_max_filesize = 1024M/g' /etc/php.iniThen restart PHP-FPM.
systemctl restart php-fpmAuto-Renew Let’s Encrypt Certificate
Edit root user’s crontab file.
sudo crontab -eAdd the following line at the end of the file to run the Cron job daily. If the certificate is going to expire in 30 days, certbot will try to renew the certificate. It’s necessary to reload the Nginx service to pick up new certificate and key file.
@daily certbot renew --quiet && systemctl reload nginx
Integrate Collabora Online with Nextcloud on Ubuntu without Docker
This tutorial is going to show you how to install Collabora Online on Ubuntu and then integrate it with an existing Nextcloud server without using Docker.
Collabora Online is a self-hostable and LibreOffice-based open-source online office suite. Its features include:
- Basic editing
- High fidelity, WYSIWYG rendering
- Supports DOC, DOCX, PPT, PPTX, XLS, XLSX, ODF document format
- Import and view Visio, Publisher and 100+ more
- Shared Editing
Collabora is a big contributor to the LibreOffice project. All of the Collabora Online codes will be eventually included in LibreOffice.
Note: This tutorial works on Ubuntu 20.04, 18.04 and 16.04. If you are using another Ubuntu version, you can install Collobaora Online with Docker.

Prerequisites
It’s assumed that you have already set up a Nextcloud server, which can be on any Linux distribution. If you haven’t already done so, then you can check out the following easy-to-understand guides.
- How to Install Nextcloud on Ubuntu 20.04 with LEMP Stack
- How to Install Nextcloud on Ubuntu 20.04 with LAMP Stack
- How to Install Nextcloud on CentOS 8 with LEMP Stack
- How to set up Nextcloud on Arch Linux
The Collabora Online server and Nextcloud server can be on the same machine or on two different machines. This tutorial shows how to install Collabora online server on Ubuntu using a Docker image built by Collabora and Nextcloud. Then integrate it with an existing Nextcloud server.
Step 1: Install Collabora Online on Ubuntu From the Official Repository
Collabora has an official package repository for Ubuntu 20.04, 18.04 and 16.04. Run the following command to add it to your Ubuntu system.
Ubuntu 20.04
echo 'deb https://www.collaboraoffice.com/repos/CollaboraOnline/CODE-ubuntu2004 ./' | sudo tee /etc/apt/sources.list.d/collabora.listUbuntu 18.04
echo 'deb https://www.collaboraoffice.com/repos/CollaboraOnline/CODE-ubuntu1804 ./' | sudo tee /etc/apt/sources.list.d/collabora.listUbuntu 16.04
echo 'deb https://www.collaboraoffice.com/repos/CollaboraOnline/CODE ./' | sudo tee /etc/apt/sources.list.d/collabora.listThen run the following command to download and import Collabora public key, which allows APT package manager to verify the integrity of packages downloaded from this repository.
sudo apt-key adv --keyserver keyserver.ubuntu.com --recv-keys 0C54D189F4BA284D
If you can’t import the public key with the above command, you can use the following command to download and import the key.
wget https://www.collaboraoffice.com/repos/CollaboraOnline/CODE-centos7/repodata/repomd.xml.key && sudo apt-key add repomd.xml.keySince this repository uses HTTPS connection, we need to install the apt-transport-https and ca-certificates package, so the APT package manager can establish secure connection to the repository.
sudo apt install apt-transport-https ca-certificatesNow update local package index and install Collabora Online. Loolwsd is the LibreOffice Online WebSocket Daemon.
sudo apt update
sudo apt install loolwsd code-brand
Step 2: Configure LibreOffice Online WebSocket Daemon
After they are installed, you can check the status of loolwsd.
systemctl status loolwsd
Hint: If the above command didn’t quit immediately, you can press the Q key to make it quit.
As you can see, it failed to start. We can check journal to see why this happened.
sudo journalctl -eu loolwsdSample output:
Apr 21 16:13:06 ubuntu loolwsd[13842]: File not found: /etc/loolwsd/ca-chain.cert.pem
Apr 21 16:13:06 ubuntu systemd[1]: loolwsd.service: Main process exited, code=exited, status
Apr 21 16:13:06 ubuntu systemd[1]: loolwsd.service: Failed with result 'exit-code'.
Apr 21 16:13:07 ubuntu systemd[1]: loolwsd.service: Service hold-off time over, scheduling r
Apr 21 16:13:07 ubuntu systemd[1]: loolwsd.service: Scheduled restart job, restart counter i
Apr 21 16:13:07 ubuntu systemd[1]: Stopped LibreOffice Online WebSocket Daemon.
Apr 21 16:13:07 ubuntu systemd[1]: loolwsd.service: Start request repeated too quickly.
Apr 21 16:13:07 ubuntu systemd[1]: loolwsd.service: Failed with result 'exit-code'.
Apr 21 16:13:07 ubuntu systemd[1]: Failed to start LibreOffice Online WebSocket Daemon.
By default, loolwsd enables TLS connection. However, it didn’t find a TLS certificate file, hence the start failure. It’s better to disable TLS in loolwsd and terminate TLS at a reverse proxy. The loolwsd configuration file is located at /etc/loolwsd/loolwsd.xml. However, it’s an XML file, which is not easy to read and edit. We can use the loolconfig tool to change configurations.
Run the following command to disable TLS in loolwsd.
sudo loolconfig set ssl.enable falseAnd enable TLS termination at the reverse proxy.
sudo loolconfig set ssl.termination trueBy default, loolwsd only allows known hosts to access its service. To allow Nextcloud to access the service, run the following command to add your Nextcloud hostname to the whitelist.
sudo loolconfig set storage.wopi.host nextcloud.example.comYou can also enable the admin account for loolwsd with the following command. You will need to set a username and password for the admin account.
sudo loolconfig set-admin-passwordRestart loolwsd for the changes to take effect.
sudo systemctl restart loolwsdNow it should be running without errors.
systemctl status loolwsdOutput:

Step 3: Set up Reverse Proxy
Nextcloud server requires a TLS certificate on the Collabora Online, so we will need to create a virtual host, give the virtual host a domain name, set up a reverse proxy and install TLS certificate. We can use either Apache or Nginx to achieve this.
Apache
Install Apache web server with the following command:
sudo apt install apache2Run the following command to create an Apache virtual host file for Collabora Online.
sudo nano /etc/apache2/sites-available/collabora.confPut the following text into the file. Replace the domain name with your actual domain name for Collabora Online. Don’t forget to create an A record for this sub-domain.
<VirtualHost *:80>
  ServerName collabora.example.com
  Options -Indexes

  ErrorLog "/var/log/apache2/collabora_error"
  # Encoded slashes need to be allowed
  AllowEncodedSlashes NoDecode

  # keep the host
  ProxyPreserveHost On

  # static html, js, images, etc. served from loolwsd
  # loleaflet is the client part of Collabora Online
  ProxyPass           /loleaflet http://127.0.0.1:9980/loleaflet retry=0
  ProxyPassReverse    /loleaflet http://127.0.0.1:9980/loleaflet

  # WOPI discovery URL
  ProxyPass           /hosting/discovery http://127.0.0.1:9980/hosting/discovery retry=0
  ProxyPassReverse    /hosting/discovery http://127.0.0.1:9980/hosting/discovery

  # Capabilities
  ProxyPass           /hosting/capabilities http://127.0.0.1:9980/hosting/capabilities retry=0
  ProxyPassReverse    /hosting/capabilities http://127.0.0.1:9980/hosting/capabilities

  # Main websocket
  ProxyPassMatch "/lool/(.*)/ws$" ws://127.0.0.1:9980/lool/$1/ws nocanon

  # Admin Console websocket
  ProxyPass   /lool/adminws ws://127.0.0.1:9980/lool/adminws

  # Download as, Fullscreen presentation and Image upload operations
  ProxyPass           /lool http://127.0.0.1:9980/lool
  ProxyPassReverse    /lool http://127.0.0.1:9980/lool

</VirtualHost>
Save and close the file. To be able to proxy traffic using Apache, we need to enable some Apache modules.
sudo a2enmod proxy proxy_wstunnel proxy_httpEnable this virtual host with the following command:
sudo a2ensite collabora.confThen restart Apache.
sudo systemctl restart apache2Nginx
Install Nginx on Ubuntu with the following command:
sudo apt install nginxCreate a virtual host file for Collabora Online.
sudo nano /etc/nginx/conf.d/collabora.confPut the following text into the file. Replace the domain name with your actual domain name for Collabora Online. Don’t forget to create an A record for this domain name.
server {
    listen 80;
    listen [::]:80;
    server_name  collabora.example.com;

    error_log /var/log/nginx/collabora.error;

    # static files
    location ^~ /loleaflet {
        proxy_pass http://localhost:9980;
        proxy_set_header Host $http_host;
    }

    # WOPI discovery URL
    location ^~ /hosting/discovery {
        proxy_pass http://localhost:9980;
        proxy_set_header Host $http_host;
    }

    # Capabilities
    location ^~ /hosting/capabilities {
        proxy_pass http://localhost:9980;
        proxy_set_header Host $http_host;
    }

    # main websocket
    location ~ ^/lool/(.*)/ws$ {
        proxy_pass http://localhost:9980;
        proxy_set_header Upgrade $http_upgrade;
        proxy_set_header Connection "Upgrade";
        proxy_set_header Host $http_host;
        proxy_read_timeout 36000s;
    }

    # download, presentation and image upload
    location ~ ^/lool {
        proxy_pass http://localhost:9980;
        proxy_set_header Host $http_host;
    }

    # Admin Console websocket
    location ^~ /lool/adminws {
        proxy_pass http://localhost:9980;
        proxy_set_header Upgrade $http_upgrade;
        proxy_set_header Connection "Upgrade";
        proxy_set_header Host $http_host;
        proxy_read_timeout 36000s;
    }
}
Save and close the file. Then test Nginx configurations.
sudo nginx -tIf the test is successful, reload Nginx server.
sudo systemctl reload nginxStep 4: Obtain and Install TLS Certificate
Now let’s obtain a free TLS certificate from Let’s encrypt. Run the following commands to install Let’s Encrypt client (certbot) from the default software repository.
sudo apt install certbotIf you use Apache web server, then you also need to install the Certbot Apache plugin.
sudo apt install python3-certbot-apacheThen issue the following command to obtain a free TLS/SSL certificate.
sudo certbot --apache --agree-tos --redirect --hsts --staple-ocsp --email you@example.com -d collabora.example.comIf you use Nginx web server, then you need to install the Certbot Nginx plugin.
sudo apt install python3-certbot-nginxThen use the Nginx plugin to obtain and install the certificate by running the following command.
sudo certbot --nginx --agree-tos --redirect --hsts --staple-ocsp --email you@example.com -d collabora.example.comYou will see the following text indicating that you have successfully obtained a TLS certificate.

Final Step: Connect Nextcloud to Collabora Online
In your Nextcloud dashboard, go to the Apps page. Next, go to Office & Text section, find the Collabora Online app, click Download and Enable button.
(Note: There’s another app called Collabora Online - Built-in CODE server, which you shouldn’t install on your Nextcloud server.)

After this apps is enabled, go to Nextcloud Settings page. Click Collabora Online tab on the left. By default, it uses the built-in CODE server, which is not suitable for production use. We need to select Use your own server and enter the domain name of your Collabora Online including https:// prefix, then click Save button.

In the advance settings, you can also set OOXML as the default format, so the files will be compatible with Microsoft Office software.

Now when you click the add button (+) in Nextcloud, you will be able to create Word, spreadsheet and presentation documents right from your Nextcloud server.

The loolwsd admin console is available at https://collabora.example.com/loleaflet/dist/admin/admin.html. You need to enter the username and password, which was created at step 2.

Troubleshooting
If Nextcloud tells you that it c
set_real_ip_from 127.0.0.1;
real_ip_header proxy_protocol;
This means that Nginx expect HTTP connection from the reverse proxy. You should edit the /etc/nginx/conf.d/collaboara.conf file and add proxy_protocol to the listen directive.
listen 127.0.0.1:443 ssl http2 proxy_protocol;Then edit the /etc/hosts file and add a static DNS record like below. Repalce 12.34.56.78 with the public IP address of the server.
12.34.56.78 collaboara.example.comcollabora.example.com should be pointed to the public IP address of your server. Don’t point it to 127.0.0.1.
You can also check the logs of loolwsd to find clues. Perhaps it’s not running.
sudo journalctl -eu loolwsdAnd check the logs of web server.
- Apache:
/var/log/apache2/collabora_error - Nginx:
/var/log/nginx/collabora.error
How to Easily Integrate OnlyOffice and NextCloud Using Docker
Previously I’ve written about integrating OnlyOffice and NextCloud the traditional way, which is a long process. Now you can easily integrate OnlyOffice and NextCloud using Docker.
There’s a new Github repository created by OnlyOffice developer team to help with integration of OnlyOffice document server and NextCloud, which allows users to create and edit Office documents directly from NextCloud. As a matter of fact, it also supports integration of OnlyOffice and OwnCloud. Since most of us are NextCloud users, I will focus on NextCloud only.
Using this method, both OnlyOffice document server and NextCloud will be installed as Docker container application and Nginx will be used as web server. I will show you how to integrate these two and how to enable HTTPS with Let’s Encrypt.
Prerequisites
To follow this tutorial, you need
- A server on which port 80 and 443 are available, and at least 1GB of RAM, preferrably 2GB of RAM. I recommend Vultr where you can get a high-performance 2GB RAM Linux VPS for only $10 per month.
- A domain name. I bought my domain name from NameCheap. Not only is their price lower than Godaddy, but also they give whois privacy protection for free.
Install Docker on Your Server
First we need to install Docker and Docker Compose, the latest version of which can be installed from Docker’s official repository. The following steps are for Ubuntu 16.04. Users of other Linux distributions can check out the official installation instructions.
Create a source list file for Docker repository.
sudo nano /etc/apt/sources.list.d/docker.listCopy the following line and paste it into the file.
deb [arch=amd64] https://download.docker.com/linux/ubuntu xenial stableSave and close the file. Then import Docker’s PGP key by running the command below.
curl -fsSL https://download.docker.com/linux/ubuntu/gpg | sudo apt-key add -Since this repository uses HTTPS connection, we also need to install apt-transport-https and ca-certificates package.
sudo apt install apt-transport-https ca-certificatesNext, update package index and install the latest version of Docker CE (Community Edition).
sudo apt update

sudo apt install docker-ce
To install the latest version of Docker Compose, run the following commands.
sudo curl -L https://github.com/docker/compose/releases/download/1.17.1/docker-compose-`uname -s`-`uname -m` -o /usr/local/bin/docker-compose

sudo chmod +x /usr/local/bin/docker-compose
Check Docker version.
docker -vSample output:
Docker version 17.09.0-ce, build afdb6d4Check Docker Compose version.
docker-compose --versionSample output:
docker-compose version 1.17.1, build 6d101fbOnce installed, the Docker daemon should be automatically started. You can check it with:
systemctl status dockerOutput:
● docker.service - Docker Application Container Engine
   Loaded: loaded (/lib/systemd/system/docker.service; enabled; vendor preset: enabled)
   Active: active (running) since Sat 2017-11-11 12:40:23 UTC; 3min 32s ago
     Docs: https://docs.docker.com
 Main PID: 4090 (dockerd)
   CGroup: /system.slice/docker.service
           ├─4090 /usr/bin/dockerd -H fd://
           └─4159 docker-containerd -l unix:///var/run/docker/libcontainerd/docker-containerd.sock --metrics-inter
If it’s not running, then start the daemon with this command:
sudo systemctl start dockerAnd enable auto-start with system boot:
sudo systemctl enable dockerClone the Github Repo
We will use git to clone the Github repository.
git clone --recursive https://github.com/ONLYOFFICE/docker-onlyoffice-owncloud

cd docker-onlyoffice-owncloud

git submodule update --remote
Edit the docker-compose.yml file.
nano docker-compose.ymlFind the 5th line.
image: owncloud:fpmSince we want to install NextCloud, change this line to :
image: nextcloud:fpmIf you want to enable HTTPS with Let’s Encrypt, add the following line in nginx service. This line tells Docker to mount directory /etc/letsencrypt on the host into Nginx container.
- /etc/letsencrypt:/etc/letsencrypt
Save and close the file. Then edit nginx.conf file in docker-onlyoffice-owncloud directory. This file will be mounted as /etc/nginx/nginx.conf in the Nginx container.
nano nginx.confAdd a server_name directive in the server block. Don’t forget to set A record for your domain name.
server {
     listen 80;
     server_name cloud.example.com;
....
Also, add the following lines in the server block because later on we will use Certbot webroot plug-in to obtain SSL certificate.
 location ~ /.well-known/acme-challenge {
       root /var/www/html/;
       allow all;
 }
Save and close the file. Now start containers defined in docker-compose.yml file.
sudo docker-compose up -dThe above command will create the onlyoffice network and start three containers: NextCloud, OnlyOffice document server and Nginx, as can be seen by issuing the following commands:
sudo docker network ls
sudo docker ps
Now point your web browser to cloud.example.com and you will be greeted by NextCloud install wizard. Before we enter anything in the wizard, let’s enable HTTPS with Let’s Encrypt.

Enabling HTTPS With Let’s Encrypt
Now install Let’s Encrypt client (certbot) on your server. The following instructions is for Ubuntu.
sudo apt install software-properties-common

sudo add-apt-repository ppa:certbot/certbot

sudo apt update

sudo apt install certbot
Since Nginx is running in a Docker container, we won’t be able to use the Nginx plugin to obtain and install SSL/TLS certificate. Instead, we can use the webroot plugin to obtain a certificate and then manually configure SSL/TLS. Run the following command to obtain a certificate.
sudo certbot certonly --webroot --agree-tos --email your-email-address -d cloud.example.com -w /var/lib/docker/volumes/dockeronlyofficeowncloud_app_data/_dataExplanation:
- certonly: Obtain a certificate. Don’t install it.
- –webroot: Use webroot plugin
- –agree-tos: accept Let’s Encrypt terms of service
- –email: Your email address used for account registration and recovery.
- -d: your domain name.
The -w flag is followed by the path to web root directory, which is /var/www/html/ in Nginx container. Its mount point on the host is /var/lib/docker/volumes/dockeronlyofficeowncloud_app_data/_data. Certbot can’t access the web root in Nginx container and must use its mount point. As you can see, I have successfully obtained an SSL certificate.

After obtaining the certificate, edit nginx.conf file in docker-onlyoffice-owncloud directory to configure SSL.
nano nginx.confAdd the following lines in server block. Remember to replace red text with your actual domain name.
   listen 443 ssl http2;

   if ($scheme != "https") {
       return 301 https://$host$request_uri;
   }

   ssl_certificate /etc/letsencrypt/live/cloud.example.com/fullchain.pem;
   ssl_certificate_key /etc/letsencrypt/live/cloud.example.com/privkey.pem;
   ssl_session_cache shared:le_nginx_SSL:1m;
   ssl_session_timeout 1440m;

   ssl_protocols TLSv1.2;
   ssl_prefer_server_ciphers on;

  ssl_ciphers 'ECDHE-ECDSA-AES256-GCM-SHA384:ECDHE-RSA-AES256-GCM-SHA384:ECDHE-ECDSA-CHACHA20-POLY1305:ECDHE-RSA-CHACHA20-POLY1305:ECDHE-ECDSA-AES128-GCM-SHA256:ECDHE-RSA-AES128-GCM-SHA256:ECDHE-ECDSA-AES256-SHA384:ECDHE-RSA-AES256-SHA384:ECDHE-ECDSA-AES128-SHA256:ECDHE-RSA-AES128-SHA256';
Save and close the file. Then restart Nginx container.
sudo docker restart nginx-serverRefresh NextCloud install wizard and you shall see a green padlock in browers’s address bar.

If there’s an error, you can check out nginx-server container’s log to find out the error.
sudo docker logs nginx-serverUsing MariaDB Database with NextCloud
If you want to use MariaDB with NextCloud, then you will need to run a MariaDB Docker container. The following command will run the official MariaDB docker container and add it to the onlyoffice network. Replace your-pass with your preferred MariaDB root password.
sudo docker run --restart=always --net dockeronlyofficeowncloud_onlyoffice --name mariadb-server -e MYSQL_ROOT_PASSWORD=your-pass -d mariadb --log-bin --binlog-format=MIXEDCheck status.
sudo docker psOnce MariaDB container is running, we can access it by issuing the following command.
sudo docker exec -it mariadb-server bashThen log into MariaDB server as root.
mysql -u root -pThen create a database for Nextcloud. This tutorial name the database nextcloud. You can use whatever name you like.
create database nextcloud;Create the database user. Again, you can use your preferred name for this user. Replace your-password with your preferred password. Notice that we want to create an user which would be able to login from NextCloud container, which has the IP address 172.18.0.3.
create user nextclouduser@172.18.0.3 identified by 'your-password';Note: Your NextCloud container may have a different IP address. Run the following command on the host to find it.
sudo docker inspect app-server | grep IPAddress
Grant this user all privileges on the nextcloud database.
grant all privileges on nextcloud.* to nextclouduser@172.18.0.3 identified by 'your-password';Flush privileges and exit.
flush privileges;

exit;
Exit out of MariaDB container.
exitNow in the NextCloud install wizard, you can create an admin account and enter the details of MariaDB database server. Note that you need to replace localhost with mariadb-server, which is the name of MariaDB container. localhost here points to NextCloud container. Because NextCloud container and MariaDB container are both in the onlyoffice network, NextCloud can resolve mariadb-server using an embedded DNS server.

And now NextCloud is successfully installed.

Using a Script to Integrate OnlyOffice and NextCloud
In the docker-onlyoffice-owncloud directory, there’s a script named set_configuration.sh. Run this script to integrate OnlyOffice and NextCloud.
sudo bash set_configuration.shNow you can create and edit Office documents from NextCloud.

